

Create and customize a desktop overlay menu
With Squarespace you can easily create a simple overlay menu for mobile. Use the SquareKicker design extension to apply this menu to desktop and add a number of customizations to make an elegant menu for your site across all devices. There are several options for how your overlay or burger menu displays on your site when opened. Keep reading to learn how, with just a few clicks and no code, you can apply a unique desktop overlay menu to your Squarespace website.

How do I add a desktop overlay menu to my site?
Follow these steps to force the overlay menu on desktop without a line of code. This is a Premium feature available with the Pro, Designer, and Agency plans.
Open the SquareKicker site menu
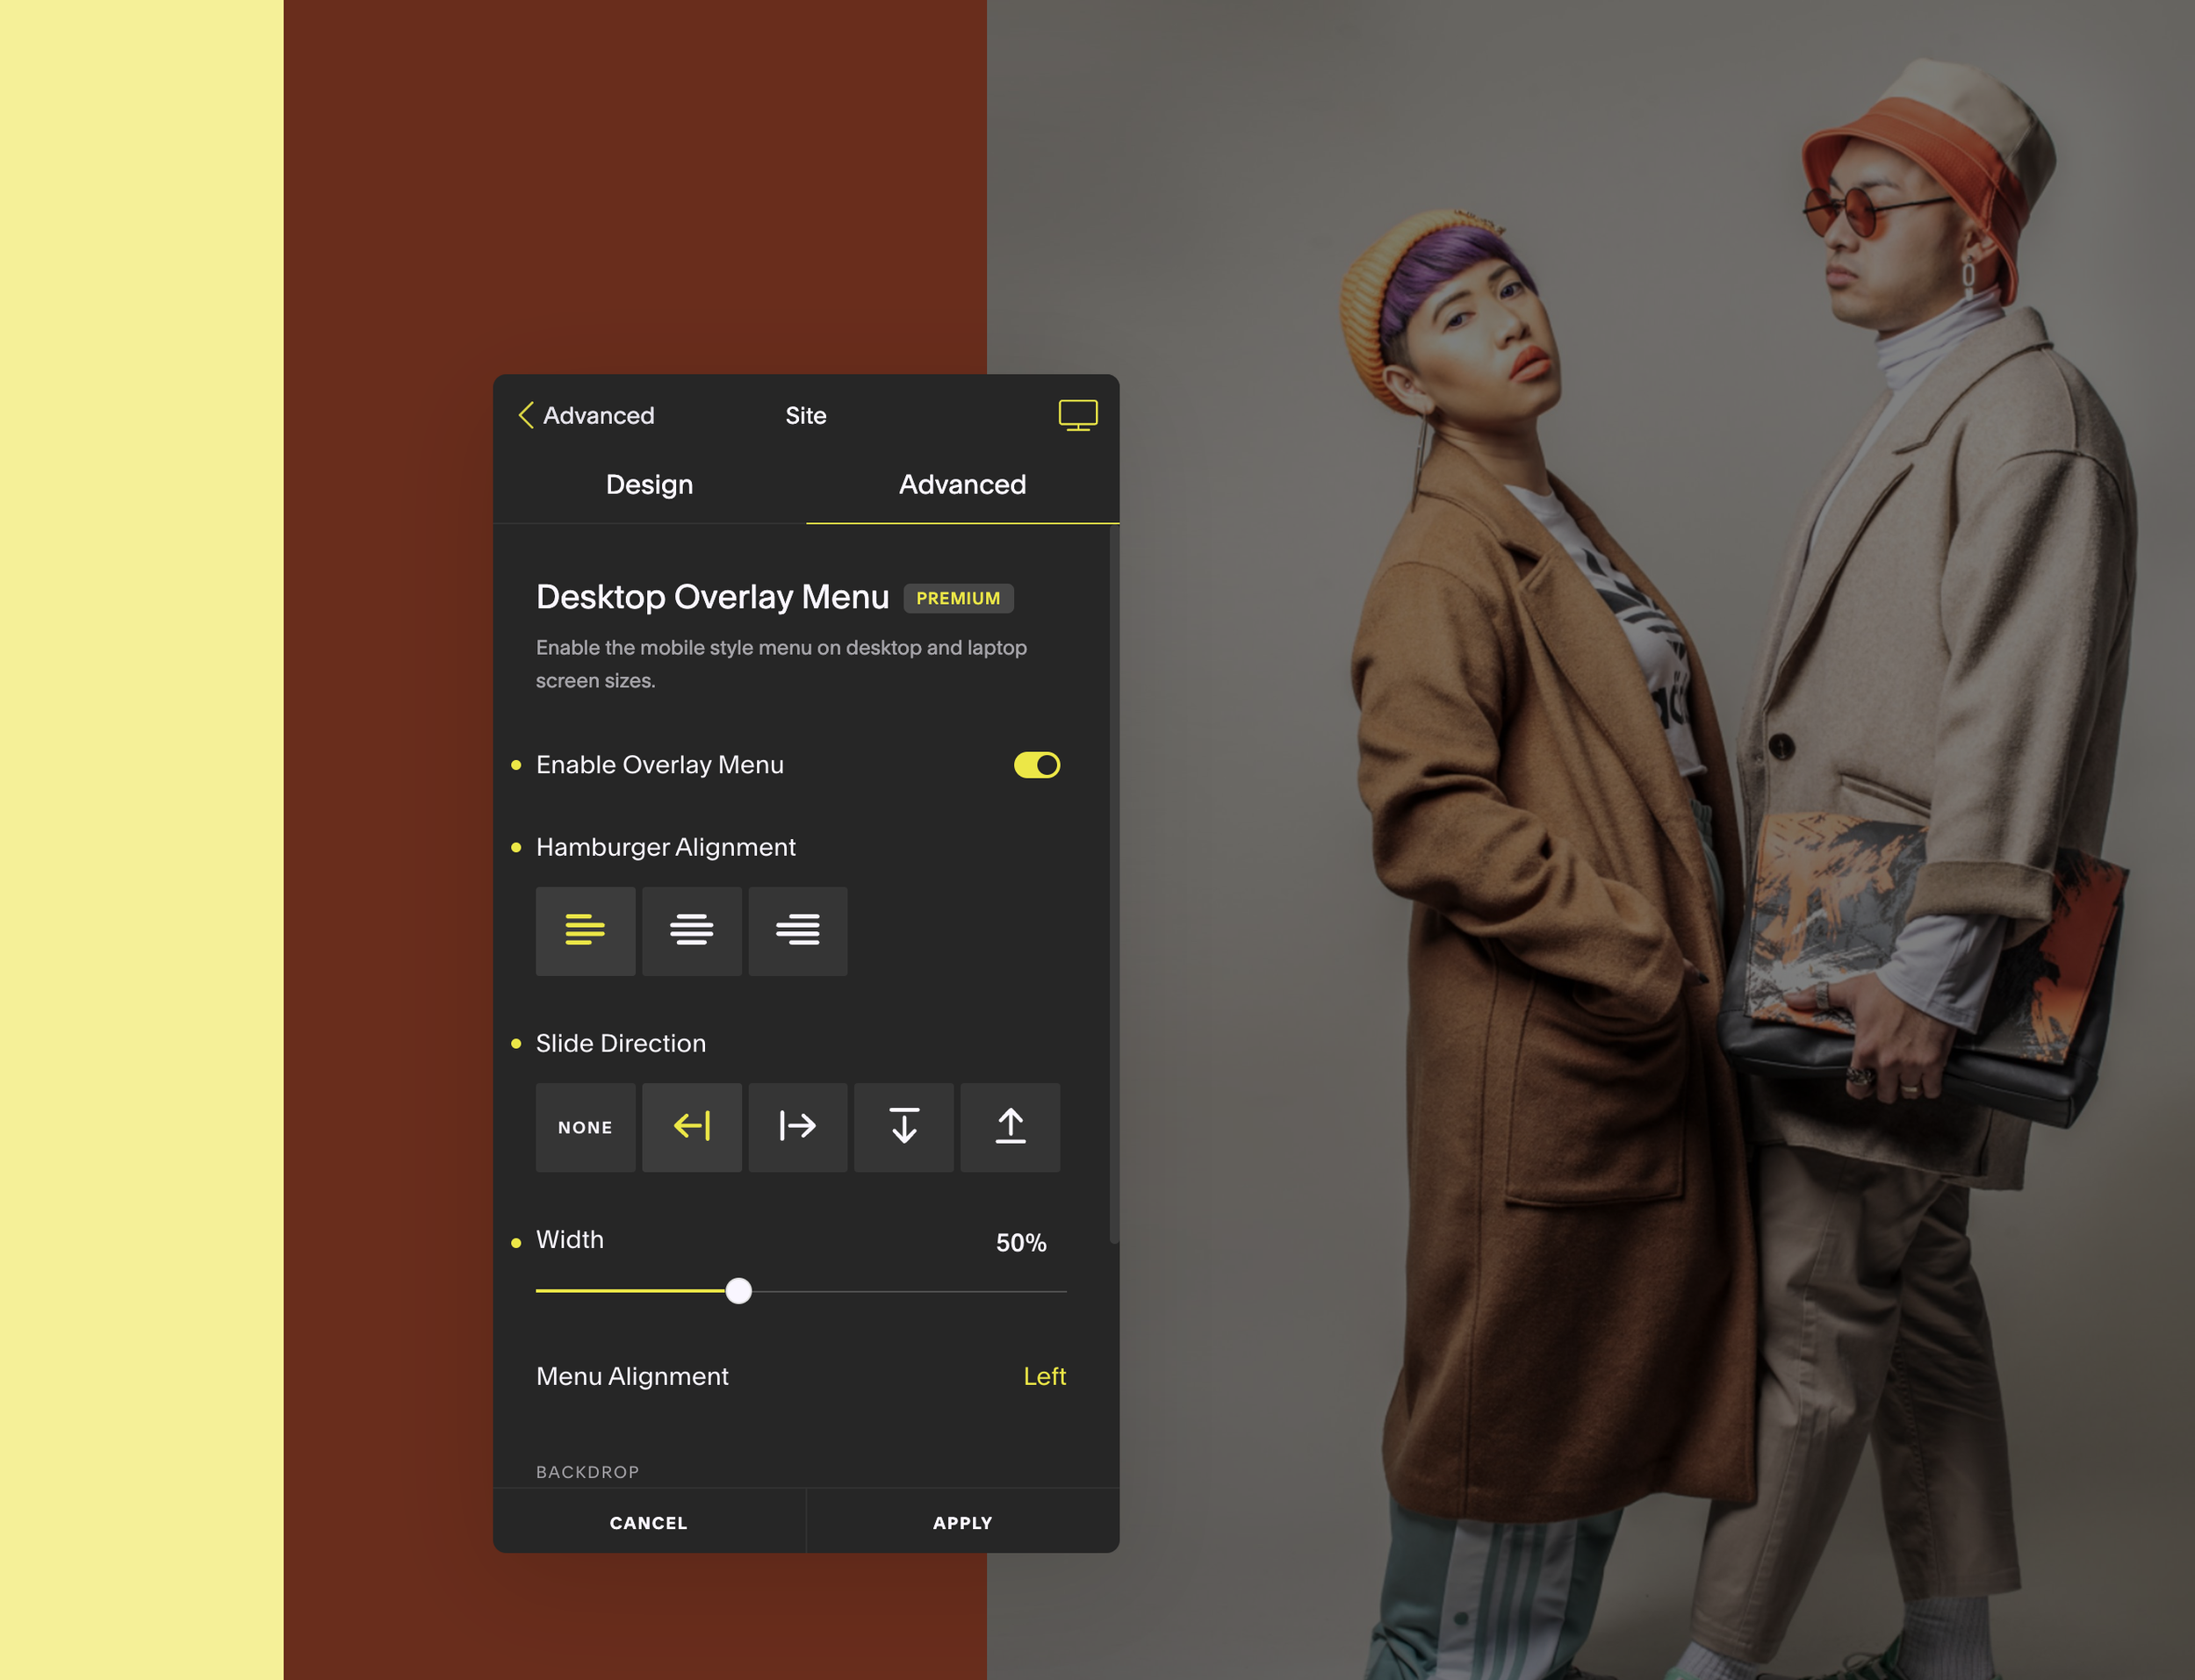
Navigate to the Advanced tab and select Desktop Overlay Menu
Toggle on Enable Overlay Menu
That’s it! You’ll now have an overlay menu for your desktop and you can see how it looks instantly by toggling Enable on and off. Now its time to add customizations to your menu. Modify all elements in the menu to create a design you love!
In our short video tutorial we’ll show you how to transform your whole website navigation by bringing the overlay menu to desktop screen sizes.
Enhance your site by changing the width of your overlay menu
Now that you have your overlay menu for desktop enabled, you can make a number of customizations to how the menu appears on your site. Using SquareKicker you can modify the width and direction of your menu, as well as a number of other elements inside the menu.
Changing the width of your menu will partially reveal your site, underneath the overlay menu. You can then make further changes by customizing how this piece of your site will appear when the menu is open. You can change the color and opacity of your backdrop creating a pleasing and engaging effect.
In the Advanced tab, use the slider to change the width of your menu (ours is set to 50% and aligned to the left of the screen).
When you change the width, your menu will not take up the full screen. This will enable some further editing options to change how your backdrop appears. Choose a color from your palette to enhance your brand vision.
Create motion with the slide direction of your menu
You can also play with the direction the menu opens from for a dynamic look - top down, bottom up, left, or right. The overlay menu will slide in from your chosen direction. Change the slide direction to captivate your site’s visitors with an engaging menu.

Further customizations to your Squarespace overlay menu
Give your menu a polished look by customizing the text, social icons, logo, background, and more. You can effortlessly personalize your menu using the SquareKicker design extension. Use the color palette to streamline design across the menu by coordinating your links and buttons with the rest of your site.
Make your background sleek and impactful by choosing a color from your palette or creating a custom color. Try some of the gradient effects in SquareKicker. You can change the gradient colors and direction. Another fun effect is changing the opacity or blur of your background which adds interest to a full screen overlay menu.
We hope you enjoy styling your menu with these design tips. It’s really simple to create a unique overlay, or hamburger, menu with just a few clicks! Enhance your Squarespace site with these customizations and more. Read our recent post about the SquareKicker color palette and learn how you can seamlessly apply color to multiple elements on your site.
